
 You know them too? Those things that have been lying around in the attic for ages, seemingly useless, or in the corner of your apartment, taking up space for absolutely no purpose. They're things you can't part with, usually because they still hold a personal memory, or because you convince yourself you'll definitely use them again someday. Everyone has things like that. We have the good news: You don't have to part with them! Because today, using an example, we'll show you how easy it is to give these things a new use and breathe new life into them!
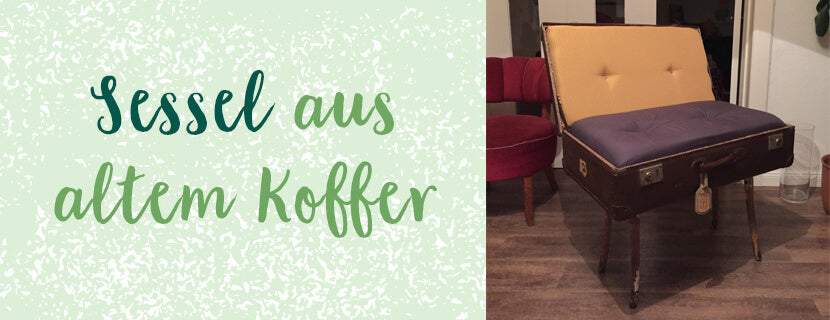
Turning old into new – with that in mind, I grabbed my grandfather's old suitcase, which had been lying around in the corner of my house gathering dust for far too long. Because my grandpa definitely wouldn't have liked that. So I decided to use the suitcase to build myself a custom armchair for my home!
Build an armchair/chair from an old suitcase: here's how!
What you need:
- An old suitcase
- 3 solid wood panels in the size of the suitcase (2 for the seat, 1 for the backrest)
- Foam as upholstery material
- Old chair legs
- Material
- Optional: 4 medium-sized buttons
Tool:
- Cordless drill
- Jigsaw (or you can have the wood cut to the size of the inside of the suitcase at the hardware store)
- screws
- Utility knife
- A long needle
- Tear-resistant yarn
- stapler

You've got everything together? Then let's get started!
Step 1: Attach the legs
First, attach the chair legs. It's best to consider how the legs will be positioned on the bottom of the suitcase so that it stands upright. To make attaching the legs easier, you can pre-drill holes in both the bottom of the suitcase and a wooden board that will be placed inside the suitcase. Then simply screw the legs in place through the suitcase!
Optional: If you don't like the vintage style of the old wooden legs, you can paint them white beforehand, for example.
Step 2: Prepare the upholstery
Now the foam boards are attached to the wooden boards. These must first be cut to the size of the wooden boards using a cutter. When purchasing the foam boards, make sure they are thick enough so that you can sit comfortably on them later and that they won't disappear in your suitcase.
Optional: If you want to add buttons to the upholstery, you'll need to drill two holes in the wooden board at the appropriate locations. After covering the upholstery with fabric, you can use a long needle to sew the buttons on with tear-resistant thread. Choose the buttons according to your mood and personal taste!
 Actually quite simple :)
Step 3: Finish the upholstery
Lay the wooden board in front of you and place the cushion on it. Now, lay the fabric over the cushion and smooth it down. Make sure there's enough overlap on the sides to secure it later. Turn everything over, stretch the fabric again, and tack it tightly to the bottom of the wooden board using the stapler. If you decided to add buttons, it's time to sew them on. Repeat the process for the second cushion.
Step 4: Put everything together
Place the panels with the cushions into the case. To attach them to the seat and backrest, you can optionally add one or two screws from the outside to secure the cushions. The chair is now essentially finished!
Step 5: one more thing
Depending on how old and wobbly the suitcase is, it might help to stabilize the backrest a bit so you can lean back properly. An old leather belt is ideal for this, which you can attach to the sides of the seat and backrest with staples. Done!
Upcycling is so easy! Your homemade vintage suitcase chair is ready!
Are you interested in upcycling and looking for more ideas? Then we have the perfect book for you: "UPCYCLING - Too Precious for the Bin" shows you great decorating ideas for your home. If you want to get creative in the garden, we recommend our DIY book "Your Creative Garden" :-)


